Introduction to GitOps and Argo CD
Hello Everyone! In this article I’ll be doing a bit of an introduction to Argo CD and GitOps.
I have recently completed Codefresh’s GitOps Fundamentals course.
In this course, you will learn and practice GitOps basics in Lab environment with Argo CD. The course consists of 5 chapters and in each chapter you will practice the topic covered and take a quiz at the end of each chapter. In chapter 5, if you complete the quiz, you will get a certificate.
Although I have experience with Argo CD, I learned a lot of things I did not know. I also learned some things I knew better. I’m writing this article as a note to myself.
If we’re ready, let’s start 🚀
We talked about k3d in my first article. In this article, let’s create a cluster with K3d and deploy Argo CD.
❯ k3d cluster create gitops-cluster-01 \
    -p "8080:30080@agent:0" \
    -p "8081:30081@agent:0" \
    --agents 2 --servers 1  \
    --image rancher/k3s:v1.27.4-k3s1
On port 8080 I will access the Argo CD Interface and on port 8081 I will access the application I will deploy.
I follow here for installation.
❯ kubectl create namespace argocd
❯ kubectl apply -n argocd -f https://raw.githubusercontent.com/argoproj/argo-cd/stable/manifests/install.yaml
Let’s check that all pods are running.
❯ kubectl get pods -n argocd
NAME                                                READY   STATUS    RESTARTS   AGE
argocd-redis-b5d6bf5f5-vvtfz                        1/1     Running   0          4m13s
argocd-repo-server-956bbd468-664qn                  1/1     Running   0          4m13s
argocd-application-controller-0                     1/1     Running   0          4m13s
argocd-notifications-controller-774bf59554-xltrn    1/1     Running   0          4m13s
argocd-applicationset-controller-64c9969bf9-rjkh7   1/1     Running   0          4m13s
argocd-dex-server-7557b8654c-wxh8j                  1/1     Running   0          4m13s
argocd-server-5bf74644c-m29t7                       1/1     Running   0          4m13s
Argo CD UI provides us with argocd-server service definition, but this service comes with ClusterIP type by default. I run a patch to access this service with NodePort.
❯ kubectl patch svc argocd-server -n argocd --type='json' -p '[{"op":"replace","path":"/spec/type","value":"NodePort"},{"op":"replace","path":"/spec/ports/0/nodePort","value":30080}]'
After applying this I can access the interface in my browser at 127.0.0.0.1:8080. Here’s how I can get the admin password,
❯ kubectl -n argocd get secret argocd-initial-admin-secret \
          -o jsonpath="{.data.password}" | base64 -d; echo
If you want to change this password, you can use this document. I give a very complex password 😛
UI lovers can change it at 127.0.0.0.1:8080/user-info.
❯ kubectl -n argocd patch secret argocd-secret \
  -p '{"stringData": {
    "admin.password": "$2a$12$.x2u70lXke0aHrUNiYda2u2SPMcCXYOPck5k/wBFHBfwCBsREkQvC",
    "admin.passwordMtime": "'$(date +%FT%T%Z)'"
  }}'
Let’s install Argo CD CLI in our local environment. We may need it in the future
❯ brew install argocd
Let’s log in to our Argo CD.
❯ argocd login 127.0.0.1:8080
WARNING: server certificate had error: tls: failed to verify certificate: x509: certificate signed by unknown authority. Proceed insecurely (y/n)? y
Username: admin
Password:
'admin:login' logged in successfully
Context '127.0.0.1:8080' updated
For more cli commands click here
Now let’s deploy our first application with Argo CD.
You may have heard of the podinfo app. For those who haven’t heard of it, let me share the Github repository here. I will do the deployment of this application.
I opened a repository like gitlab.com/emreberber/manifests to manage my Kubernetes manifests. You can review it if you want.
We logged into the interface, click on the + New App button
○ Application Name  →  podinfo
○ Project Name      →  default
○ Sync Policy       →  Manual
○ Repository URL    →  https://gitlab.com/emreberber/manifests.git
○ Path              →  ./apps/podinfo
○ Cluster URL       →  https://kubernetes.default.svc
○ Namespace         →  default
We can skip the other parts. kubernetes.default.svc here refers to the cluster where Argo CD is installed.
We create the application with the Create button.
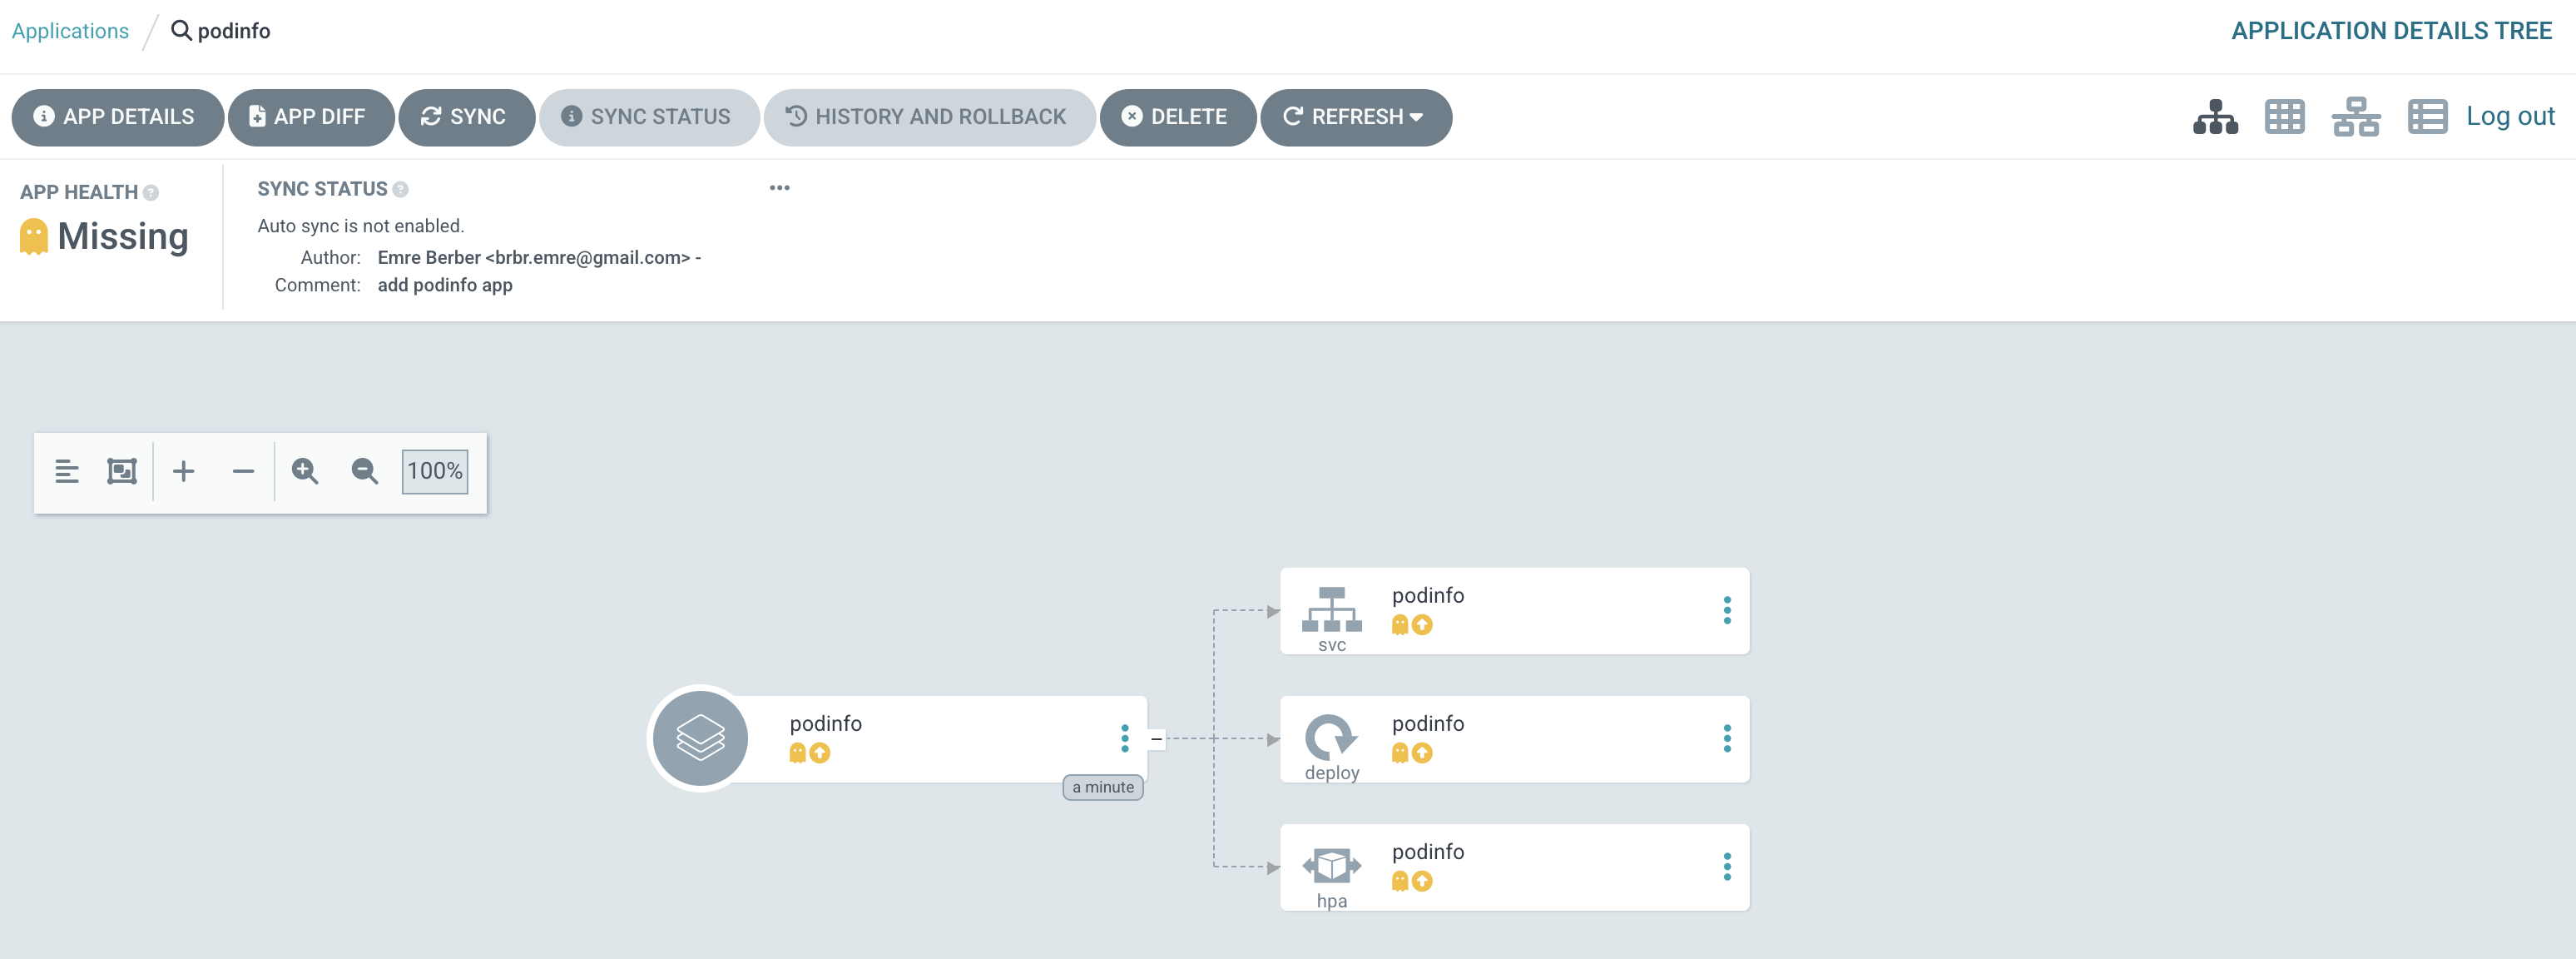
If you go and look at the cluster, you’ll see that nothing has been deployed yet because it’s waiting for us to sync the application.
It also tells us that Auto Sync is not enabled in the Sync Status section. Let’s click on the Sync button.
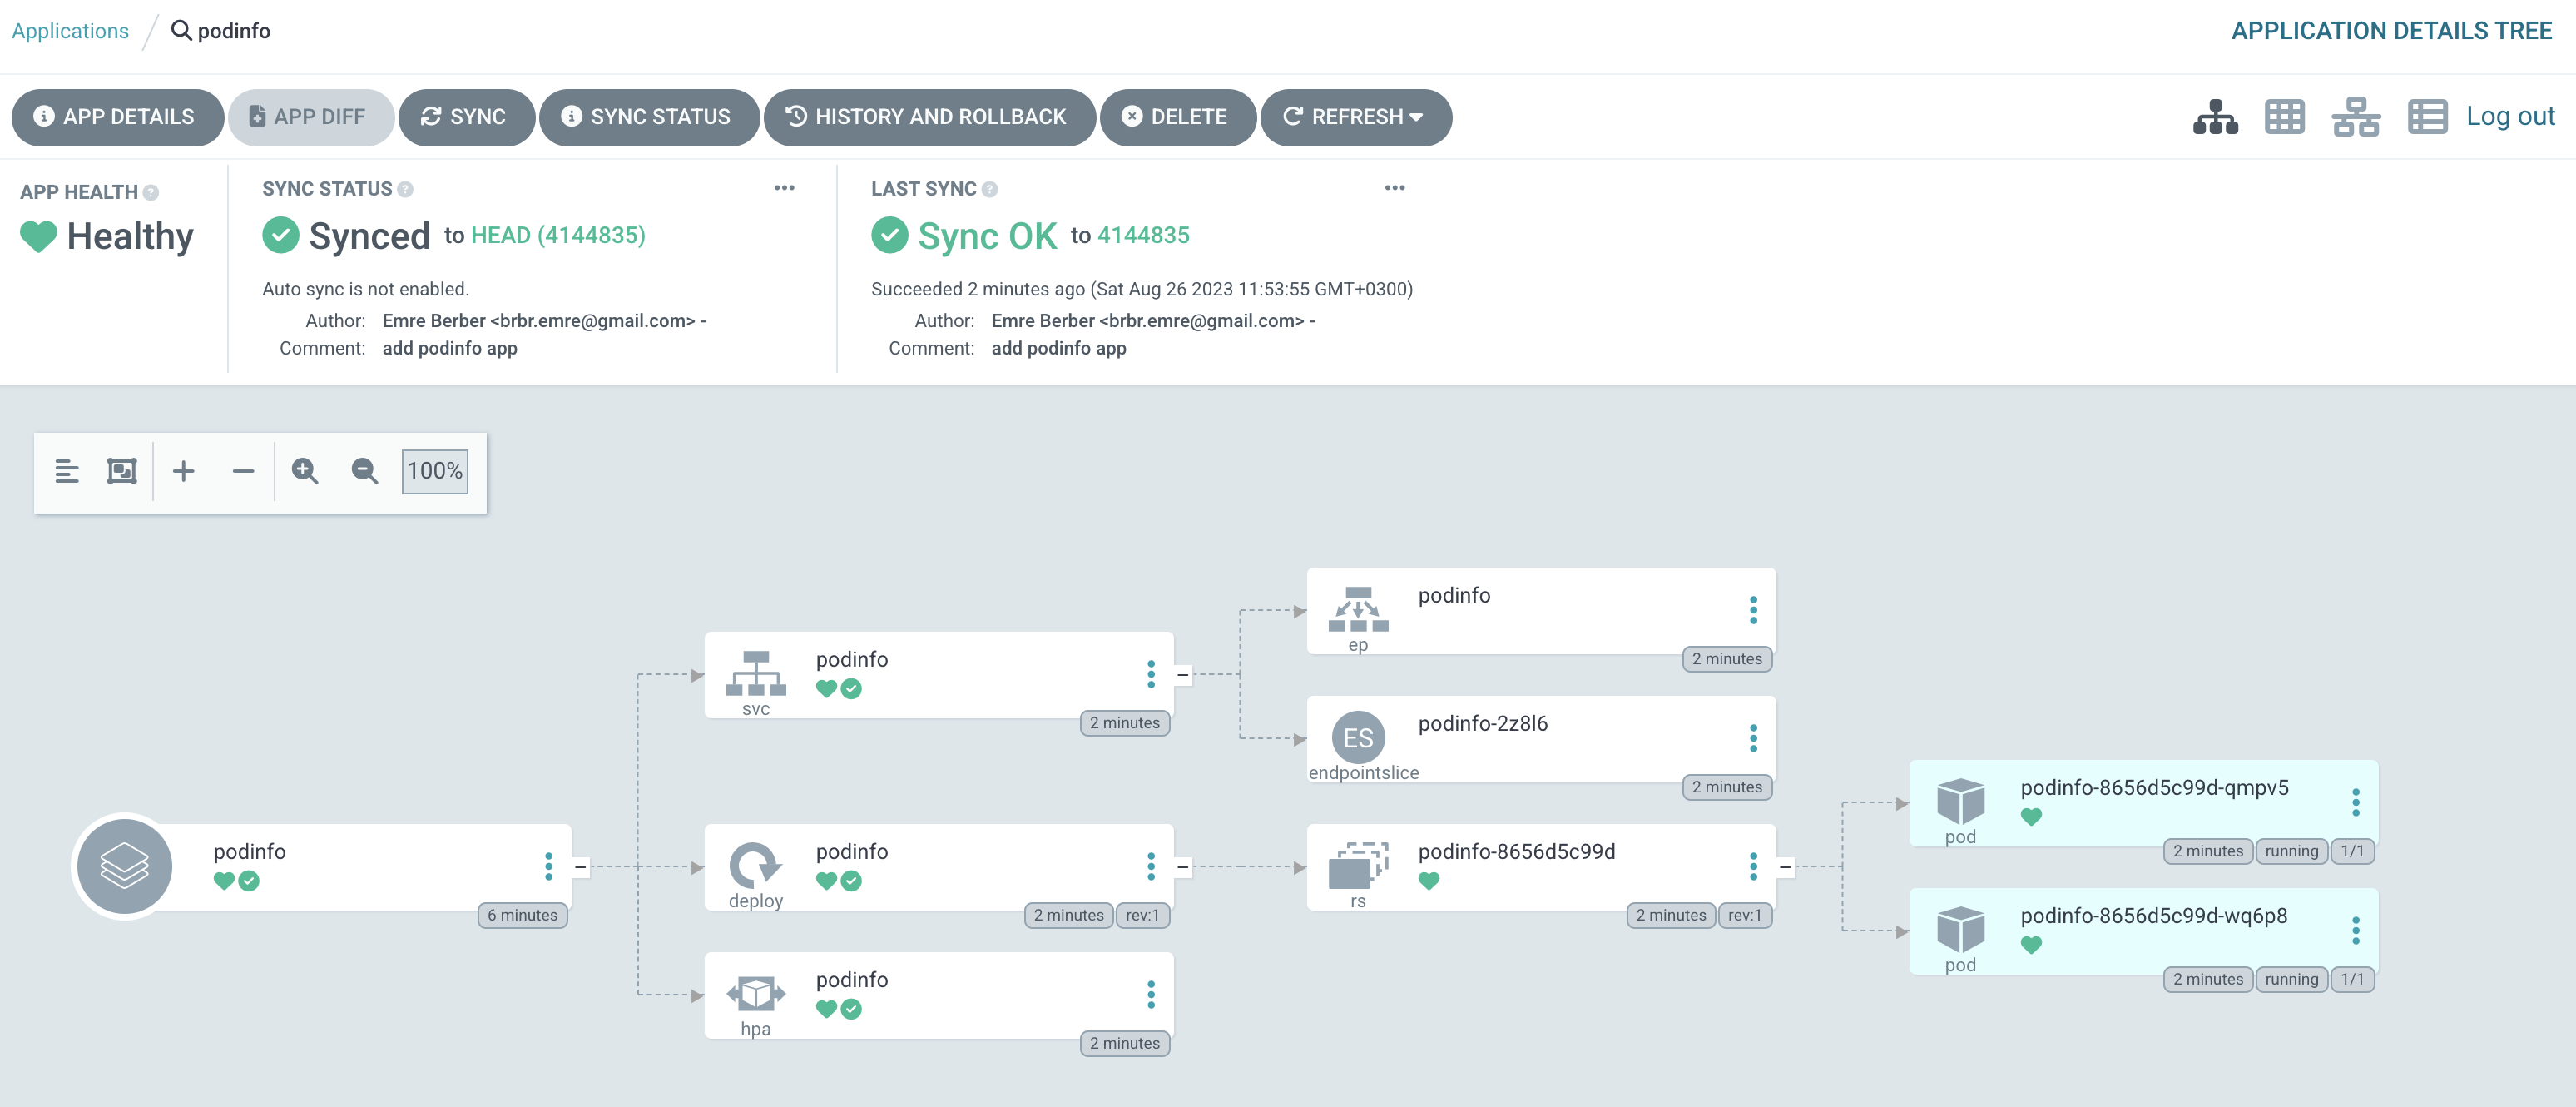
And that’s it. 🥳 This is how you can deploy your application with Argo CD in its simplest form. You can see what we deployed at 127.0.0.1:8081
This is the simplest form of this. Now let’s continue by building scenarios on this.
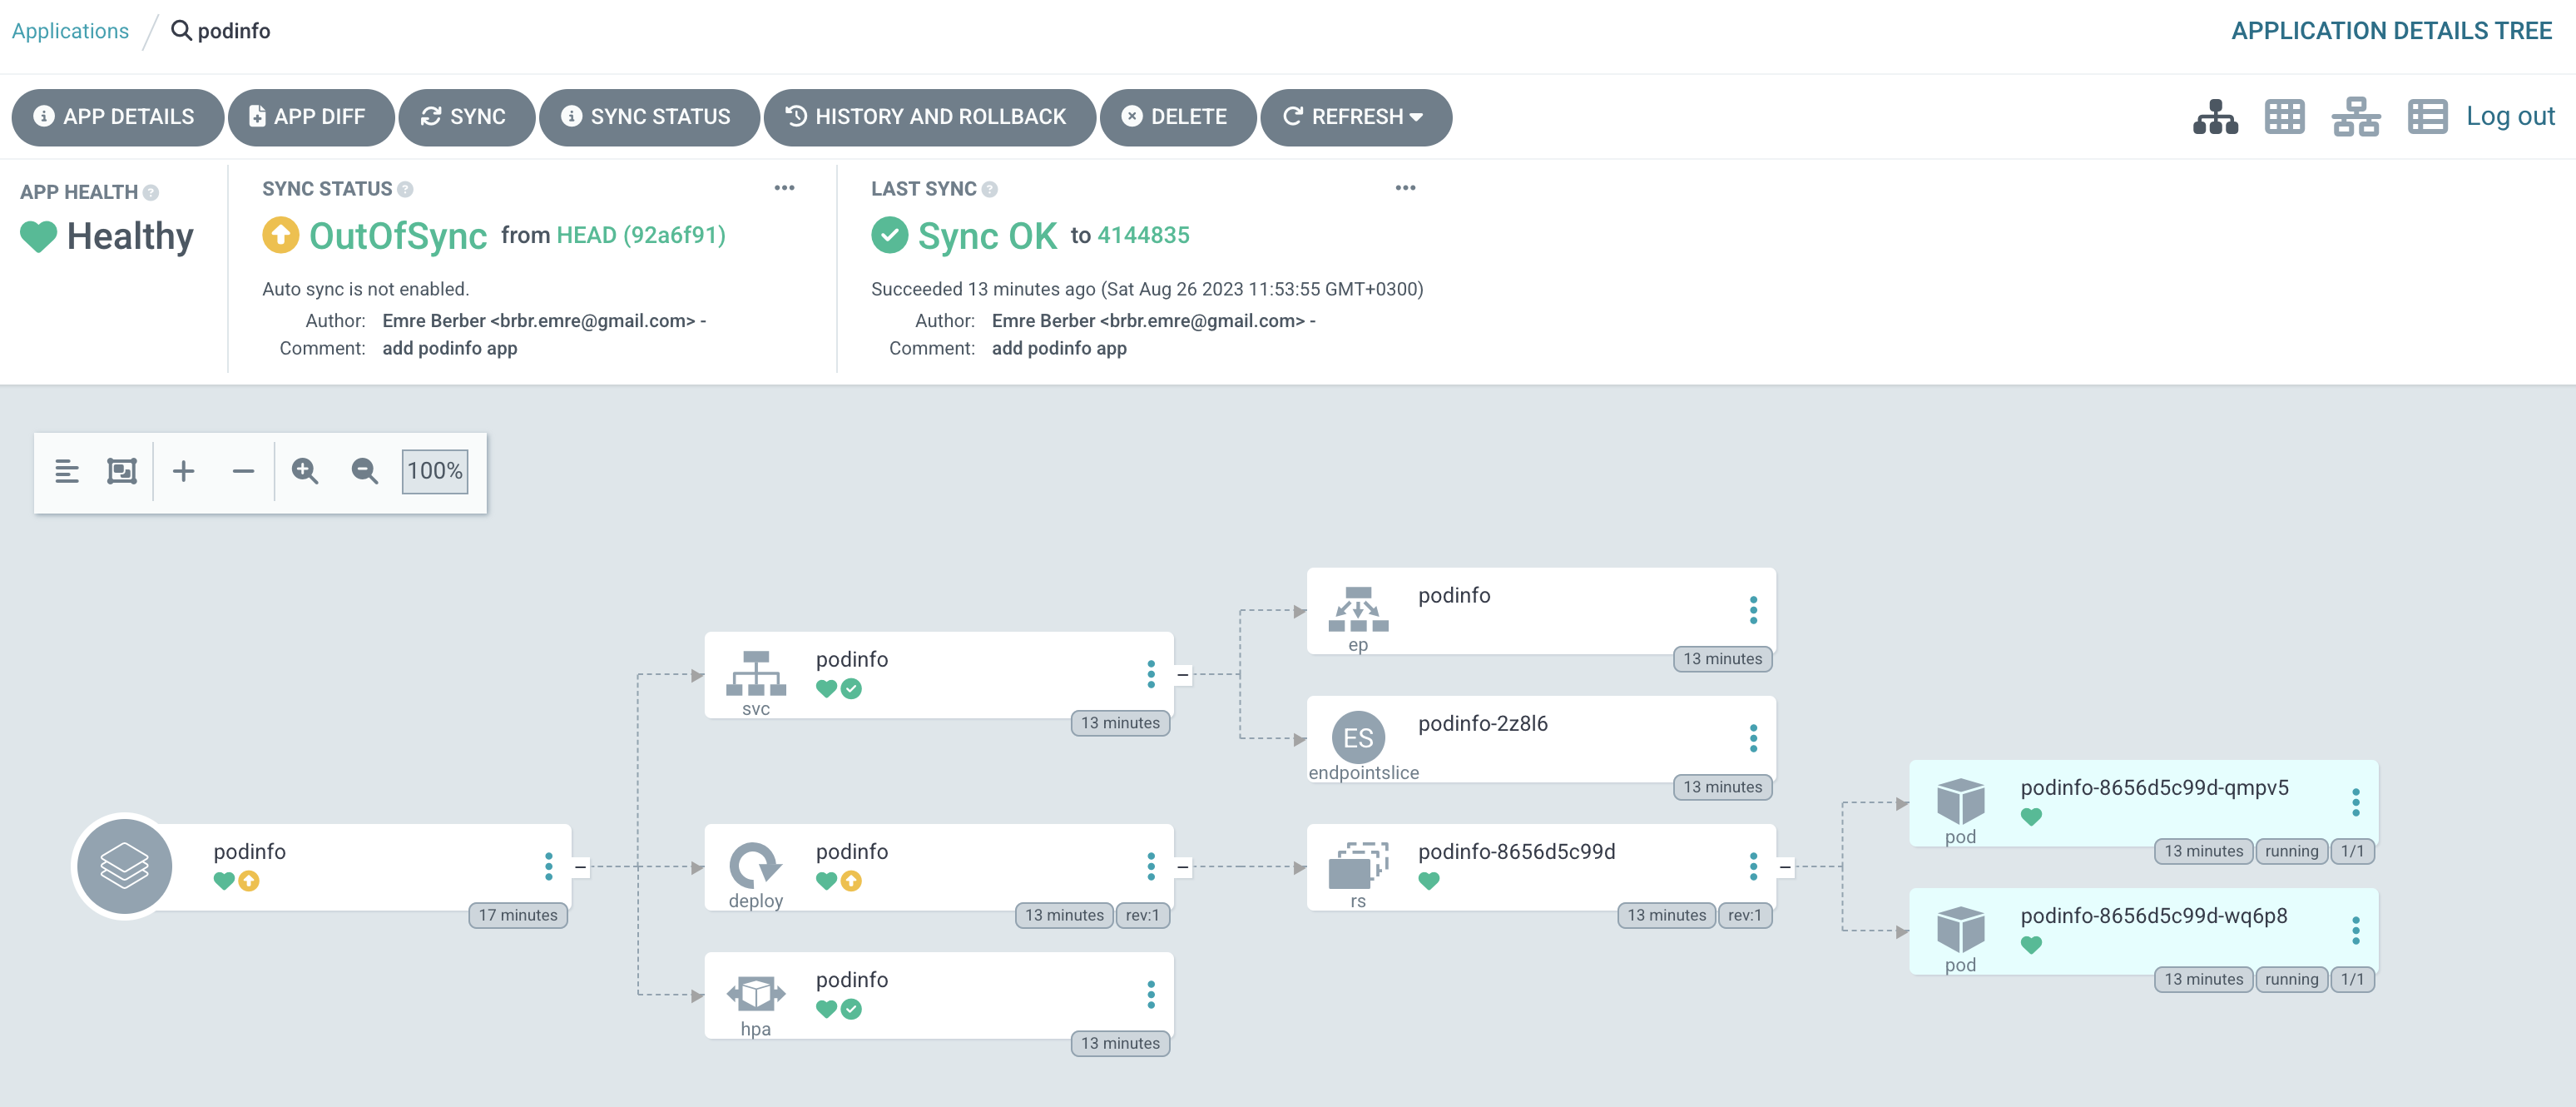
My application is running now and I want to upgrade to the next version. For this, I update the podinfo image in the deployment.yml file to 6.4.1 instead of 6.4.0 and commit it.
Argo CD checks the remote repository every 3 minutes. You can click the Refresh button to avoid waiting for this time. After that, the Sync Status will be shown as OutOfSync.
timeout.reconciliation value in the argocd-cm config map. Read more …
We just logged in with CLI. Now let’s see how to sync the application with CLI.
❯ argocd app list
❯ argocd app sync podinfo
Of course we will not sync this way for every change. Let’s automate this process.
Let’s revert our application back to the old version 6.4.0.
I click on the Refresh button and this time Argo CD automatically starts the update without me having to Sync. You can see the changes at 127.0.0.0.1:8081.
The app works as 2 pods. I wanted it to work as 3 pods, but since I'm not used to GitOps yet, I connected directly to Kubernetes Cluster and did that.
❯ kubectl patch hpa podinfo -p '{"spec":{"minReplicas": 3}}'
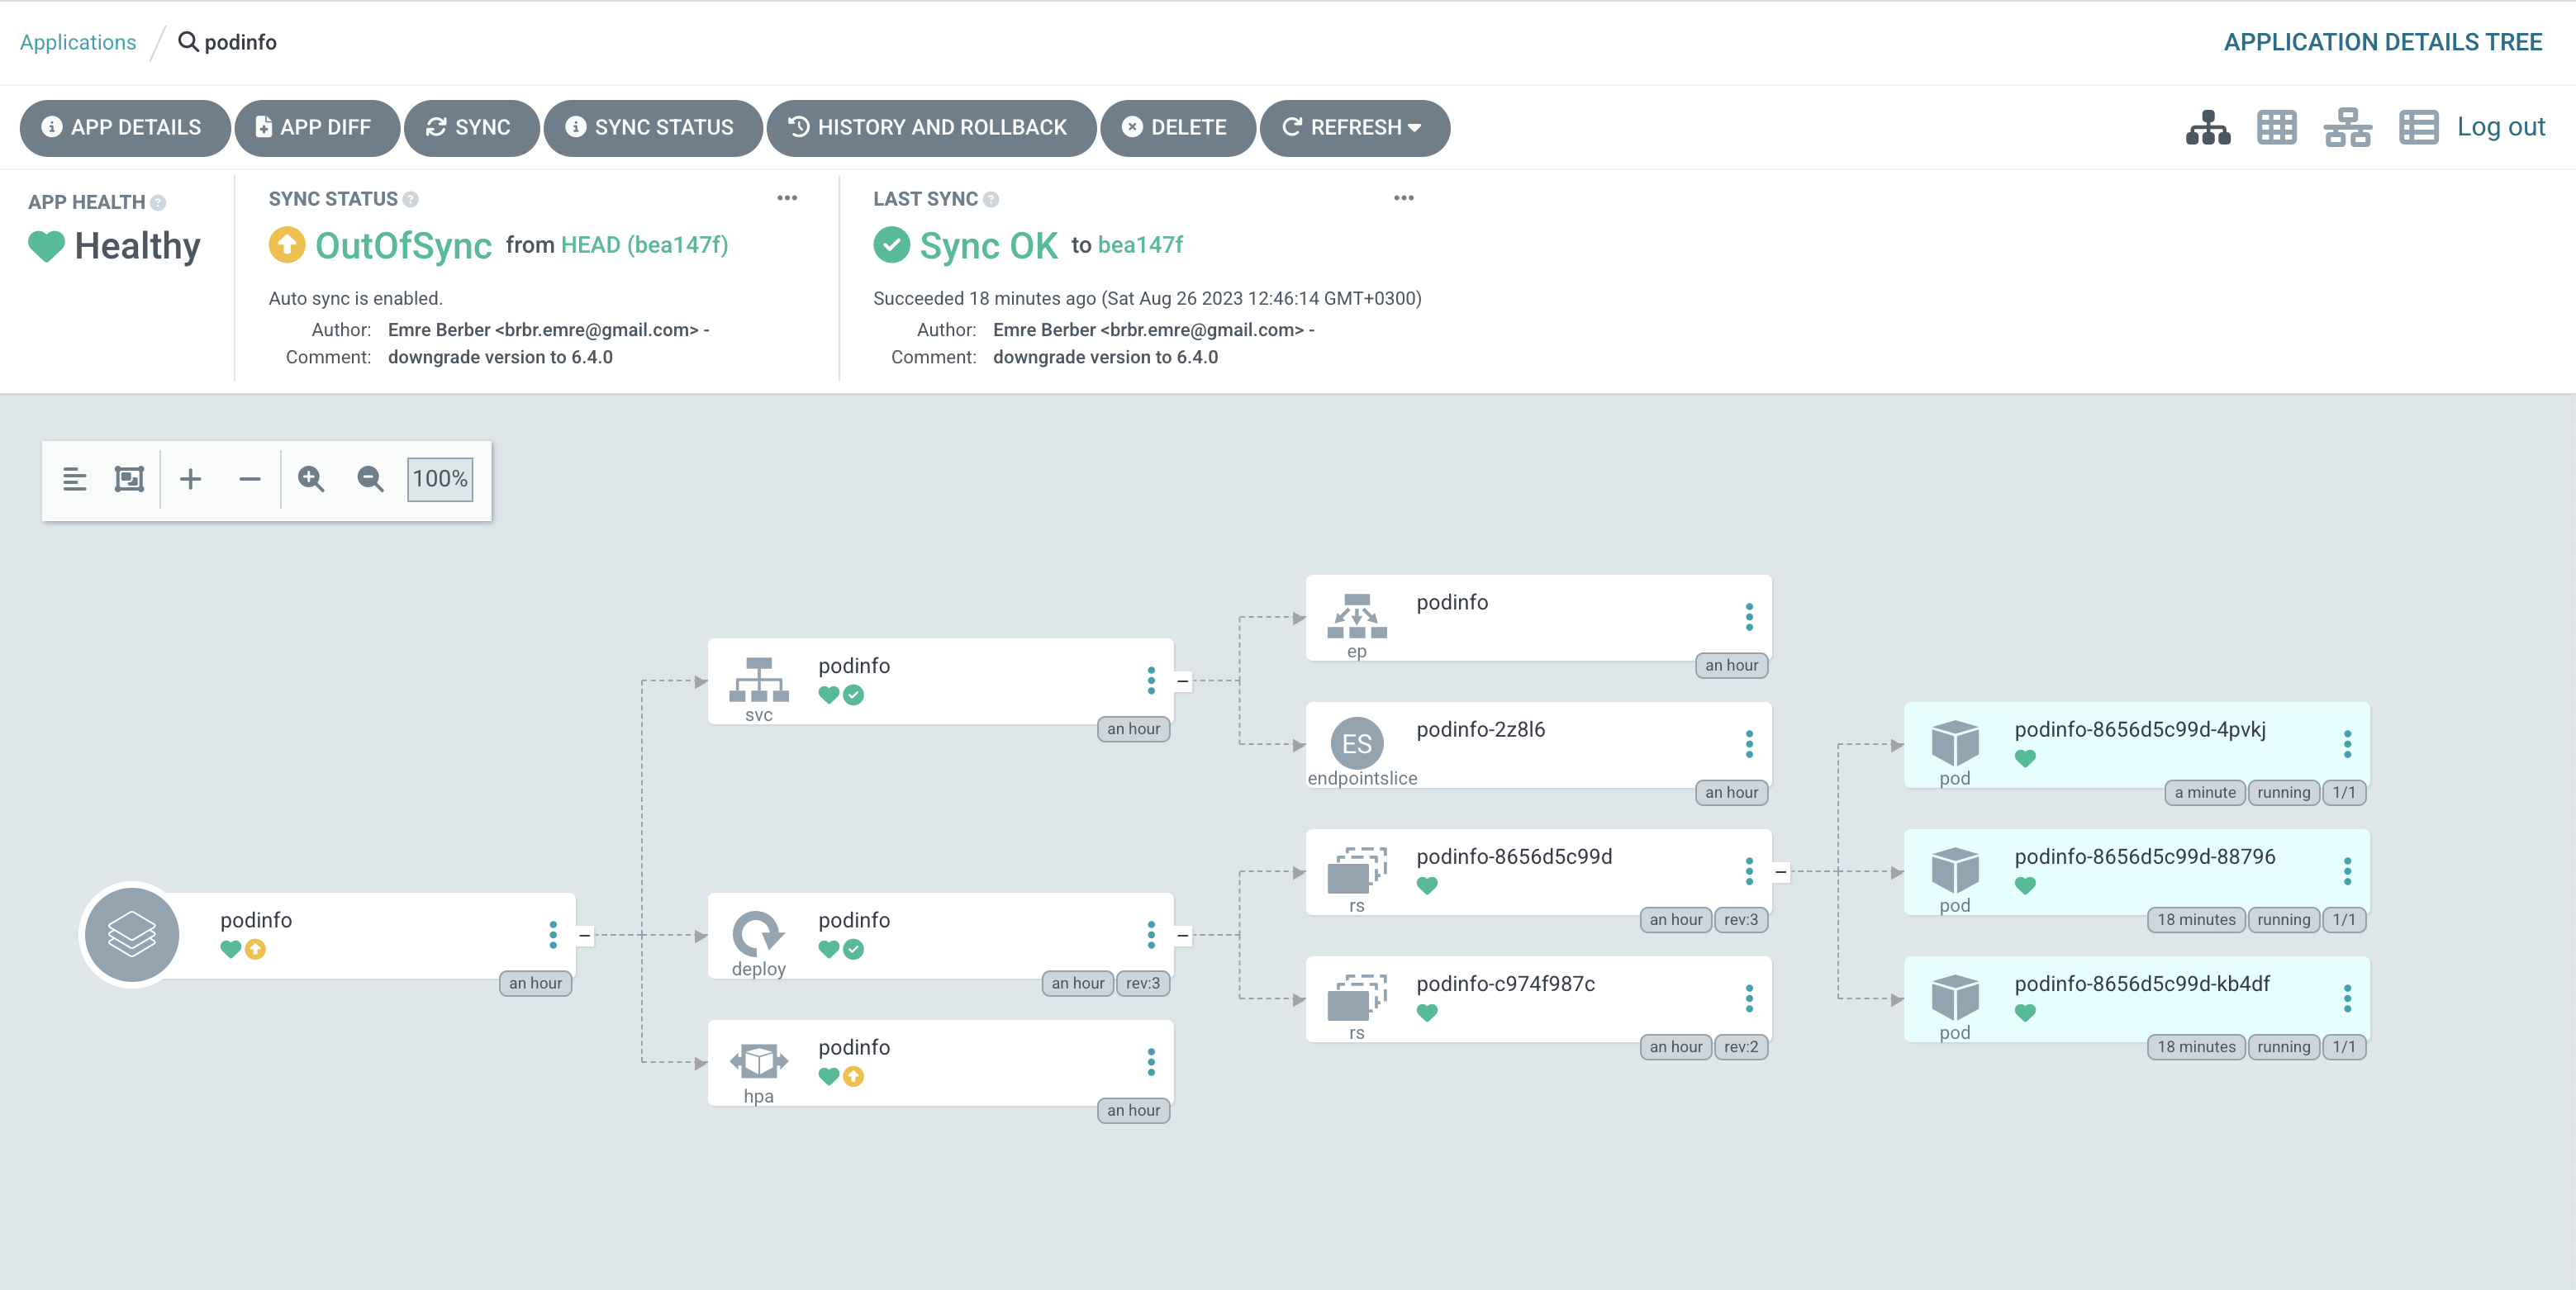
The reason why the application is OutOfSync is that the state in the Repository is different from the state in the Cluster. You can also see this in the Diff section of the Application. So how can we prevent this situation ? This is possible with Self Heal. With Self Heal, if a change is made in the cluster other than the condition we give, Argo CD will not allow it and will pull it to the desired state. Let’s do this.
As you can see Argo CD immediately brought it back to the state in the repository.
Another term that will catch your attention in this section is Prune Resorces. With Prune Resources you specify whether an object deleted in the repository should also be deleted in the target cluster.
For example, if the Prune Resources parameter is enable, if I delete my service definition in the repository, it will delete this object from the cluster, but if it was disable, this time it would go to OutOfSync state and wait for me to delete it manually.
Let’s test this too. I committed like this. Currently, Prune Resources is disable.
My application is already in OutOfSync state. Let’s look at the reason now.
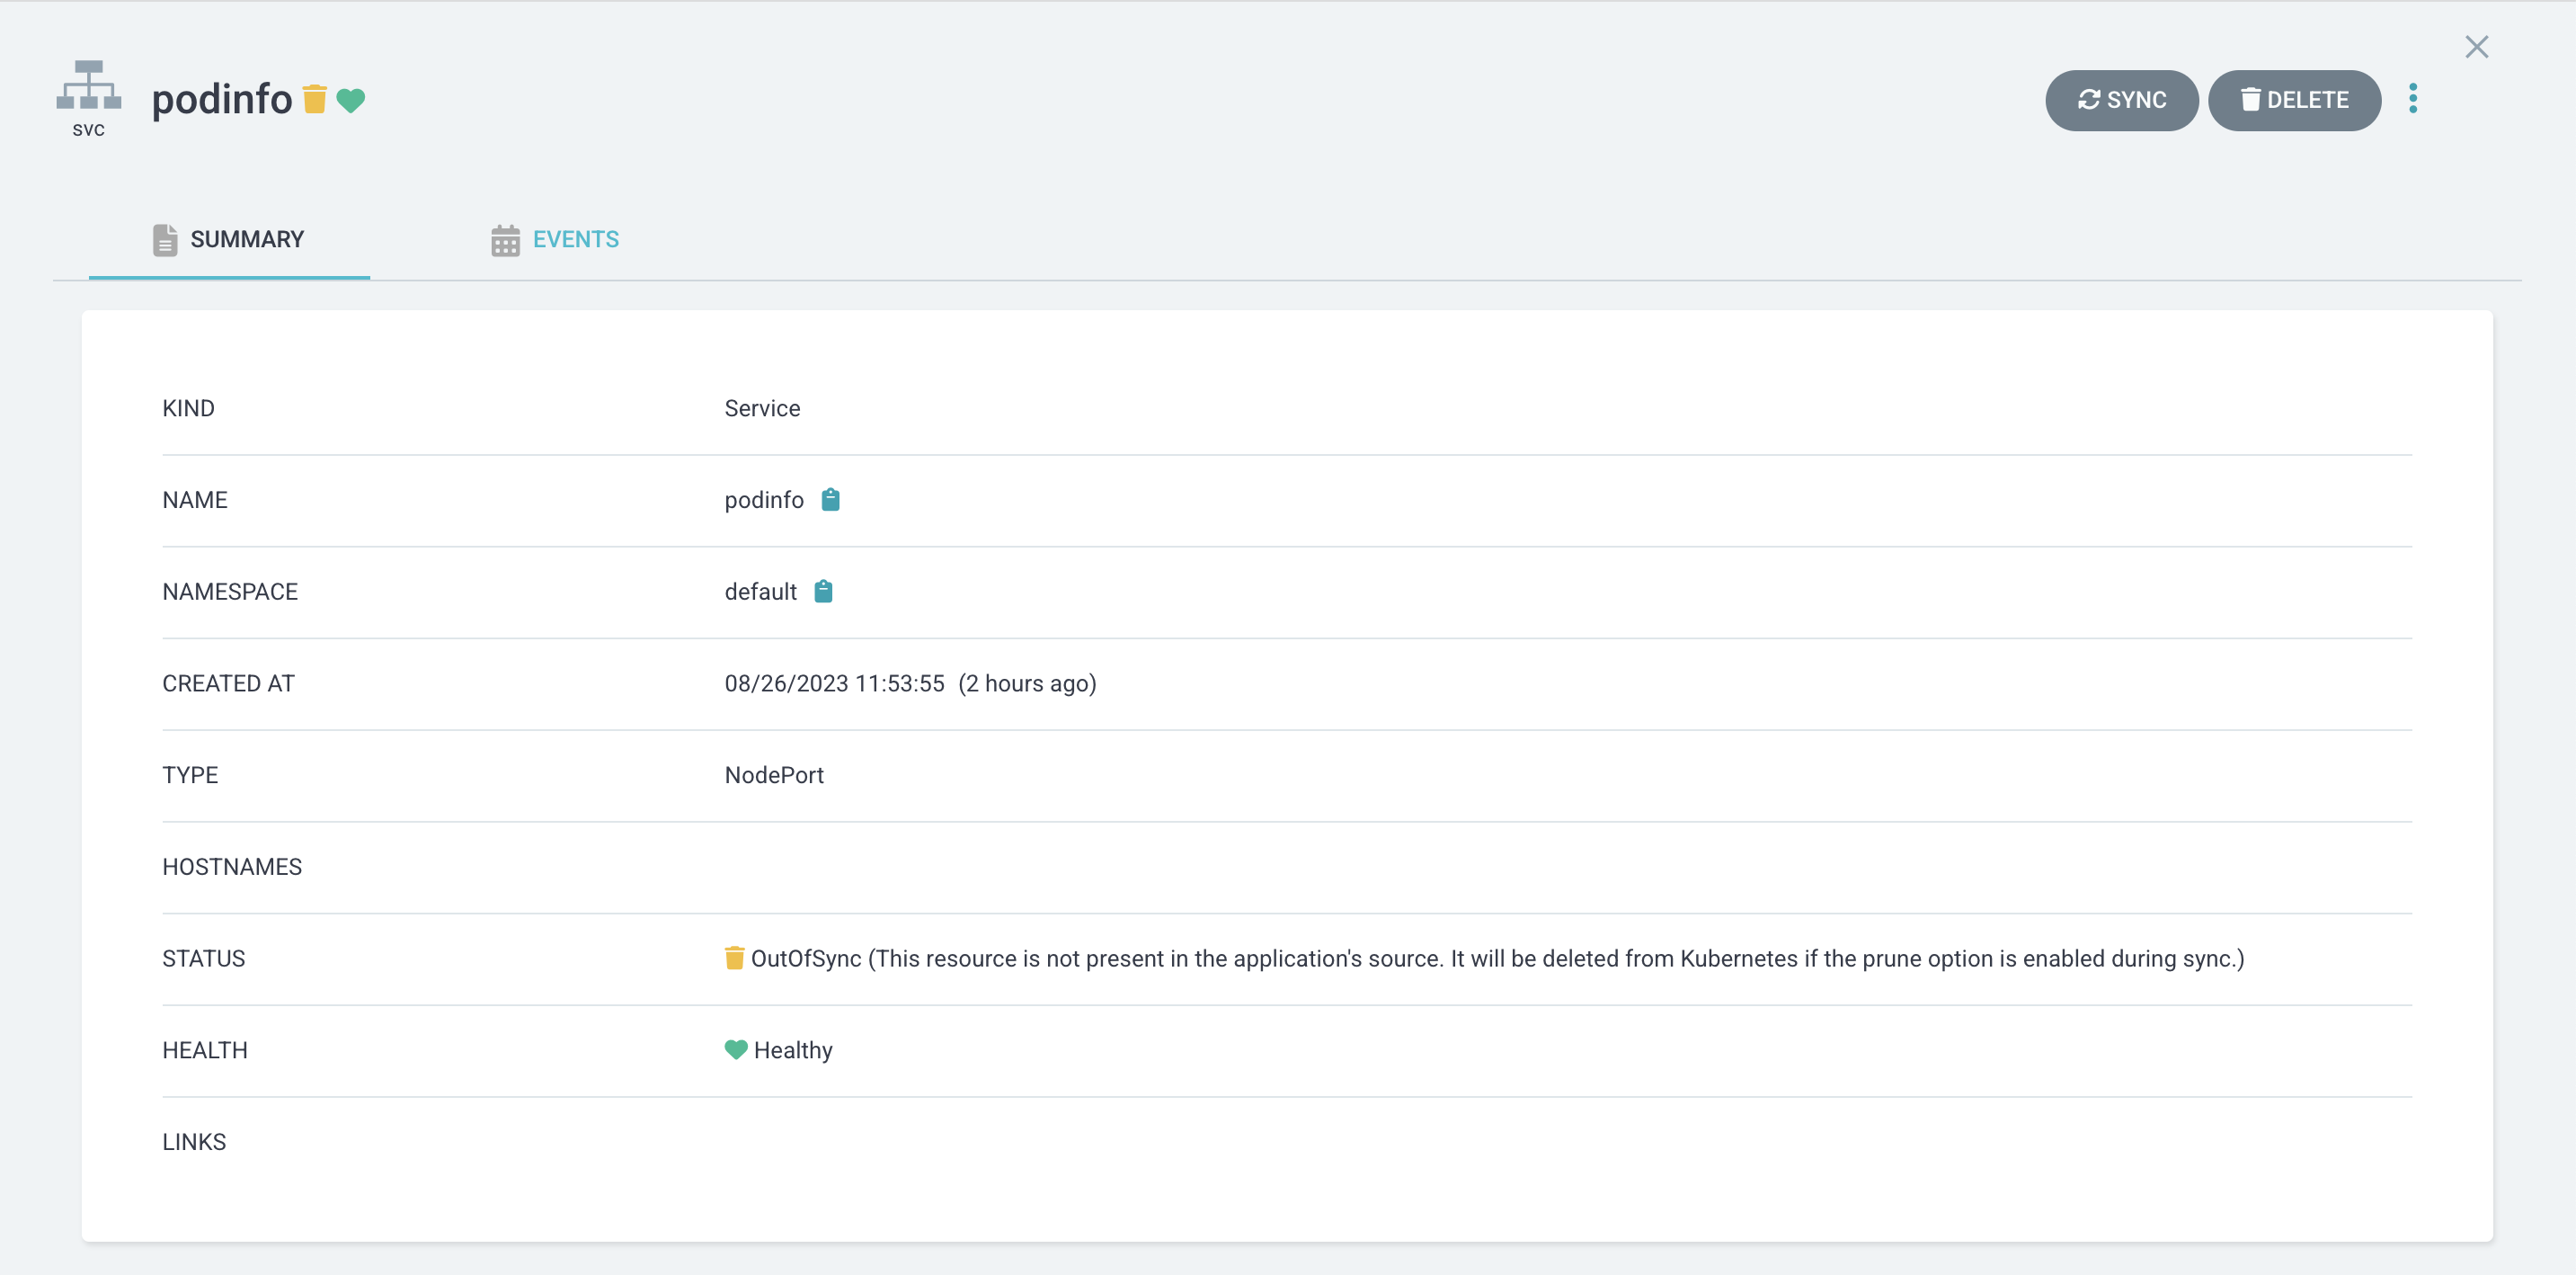
The Status section says This resource is not present in the application's source. It will be deleted from Kubernetes if the prune option is enabled during sync actually explains the situation. It tells us that this resource exists in the Cluster but not in the source repository and expects us to manually delete it so that it can be Synced again.
Let’s enable Prune Resources.
Our application now automatically applies the changes in the Repository to the Cluster, fixes them when something is done in the Cluster without us knowing, and deletes them from the cluster when something is deleted in the source repository.
Now let’s see how we can manage the Application we created from the interface with the manifest
This is the document that should be open in front of us, friends.
First of all, I delete Application from the interface. Then I apply the definition I created below with kubectl apply.
apiVersion: argoproj.io/v1alpha1
kind: Application
metadata:
  name: podinfo
  namespace: argocd
spec:
  project: default
  source:
    repoURL: https://gitlab.com/emreberber/manifests.git
    targetRevision: HEAD
    path: ./manifests/application.yml

    directory:
      recurse: false

  destination:
    server: https://kubernetes.default.svc
    namespace: default

  syncPolicy:
    automated:
      selfHeal: true
      prune: true
That’s all there is to it. You can also use Helm or Kustomize in the repository. We can make examples about these in the future.
The course also covers Blue Green and Canary deployment with Argo Rollout in Progressive Delivery. I will write about these topics another time
After publishing this article, I will start Codefresh’s GitOps at Scale course and a more detailed article will probably come on what we have done here.
See you in the next article. 🤞🏻