AWS Notes: IAM
IAM (Identity and Access Management) is one of the most important services in AWS. It controls who can access what in your AWS account. Understanding IAM is essential for securing your cloud infrastructure.
This post covers the basics: securing the root account, creating users and groups, setting up MFA, creating custom policies, and working with IAM roles for temporary access.
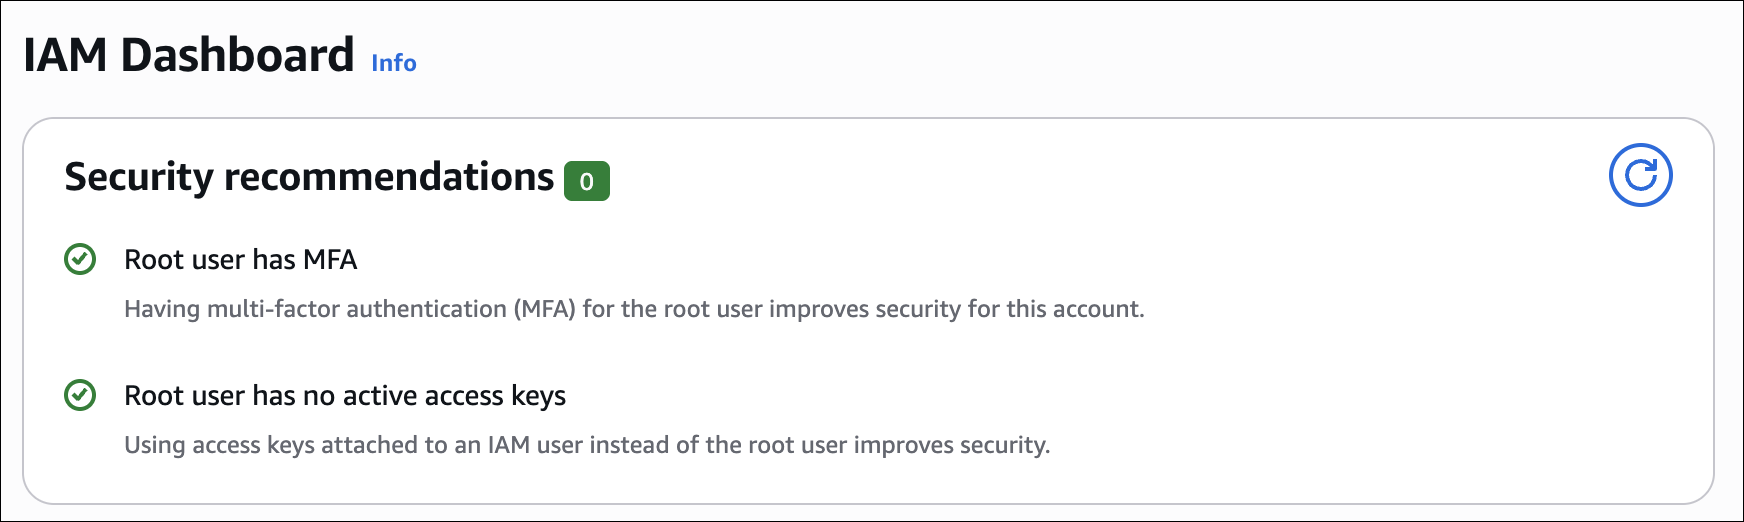
Root Account Security
The root account is the owner of your AWS environment. It has the highest level of permissions. Because of this, it is very important to protect it carefully. Before creating any users or roles, we must secure the root account.
Important: Never use the root account for daily operations. Always create an IAM user with admin permissions for regular tasks.
Key Points
| Topic | What You Need to Know | Where in the AWS Console |
|---|---|---|
| Root Account Power | The root user has full control of the AWS account. Use it only for special actions. | Top-right → Account Name → My Security Credentials |
| Do Not Use Daily | Do not use the root account for normal operations. Create an admin IAM user instead. | IAM Console → Users → Create user |
| Enable MFA | Turn on MFA to protect the account. This adds a second security step. | My Security Credentials → MFA → Assign MFA |
| MFA Options | Use a virtual MFA app (Google Authenticator, Authy) or a hardware key (YubiKey). | Same MFA screen → Choose device type |
| Delete Access Keys | Root access keys are dangerous. If any exist, delete them immediately. | My Security Credentials → Access Keys |
| Never Create New Access Keys | Do not generate new access keys for the root user under any condition. | My Security Credentials → Access Keys |
| Update Contact Info | Keep the root email and recovery details correct and accessible. | Account Menu → Account → Contact Information |
| Use Only for Rare Tasks | Use the root account only for billing, support, or account-level actions. | Console Home → Billing and Cost Management |
Creating IAM Users
- Go to IAM Console → Users → Add user
- Enter the username:
john.developer,emily.ops,sarah.security,emre.berber - Select AWS Management Console access → create password
- Click Next: Permissions
Password Policy
Set a password policy to enforce security requirements for all users:
- Go to IAM → Account settings → Password policy
- Configure the following:
- Minimum password length: 12 characters (recommended)
- Require uppercase letters: Yes
- Require lowercase letters: Yes
- Require numbers: Yes
- Require symbols: Yes
- Password expiration: 90 days (optional)
- Prevent password reuse: Last 3 passwords
Password policy applies to all IAM users in your account. It helps enforce strong passwords and reduces security risks.
User Permissions: Inline vs Managed Policies
When assigning permissions to users, you have two options:
Managed Policies:
- Created separately and can be reused
- Attached to multiple users, groups, or roles
- AWS managed (like
AdministratorAccess) or customer managed (your custom policies) - Easier to manage and update
Inline Policies:
- Embedded directly in a user, group, or role
- Cannot be reused or shared
- Useful for user-specific permissions that won’t be needed elsewhere
Best practice: Use managed policies for common permissions. Use inline policies only for unique, user-specific cases.
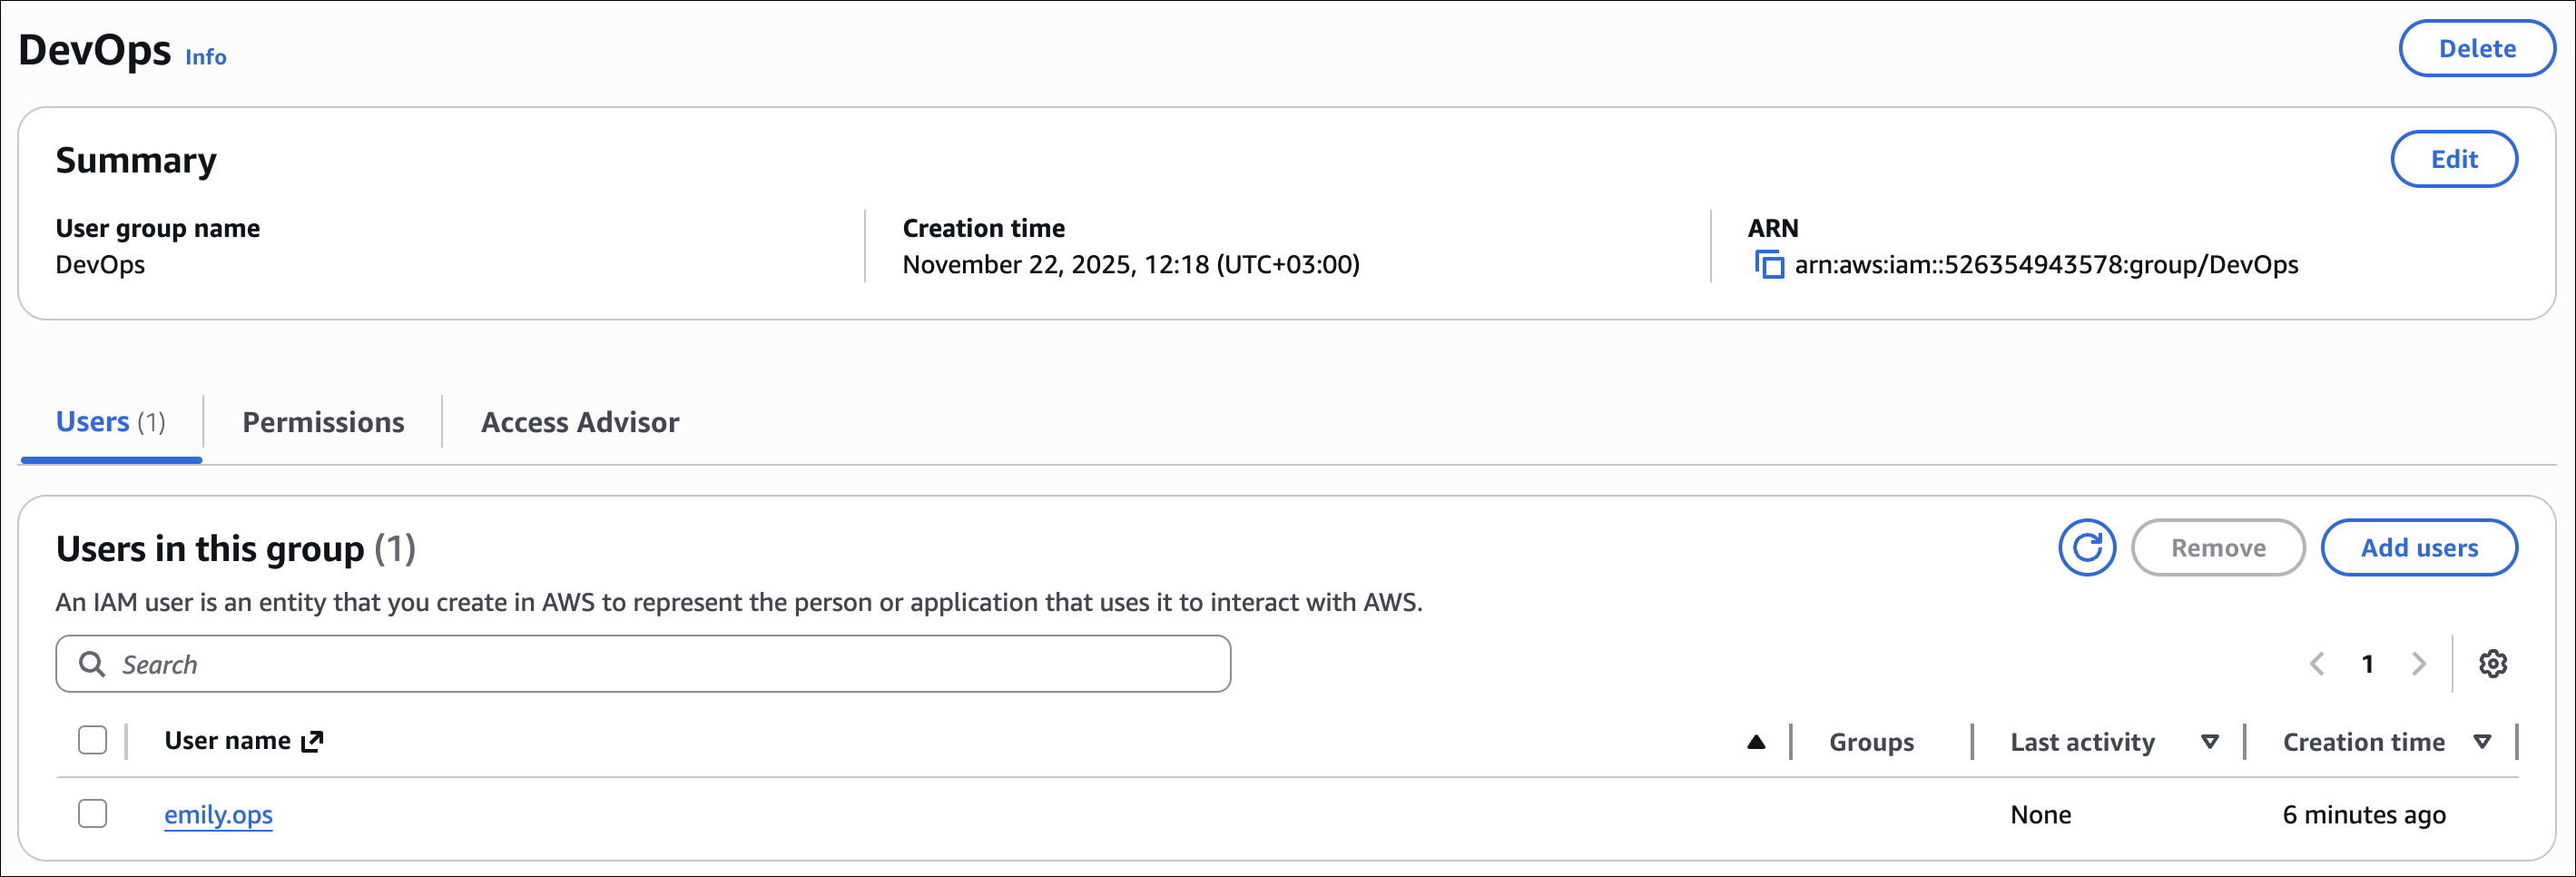
Creating IAM Groups
- Go to IAM Console → Groups → Create group
- Create the following groups and attach policies:
| Group | Policy | Notes |
|---|---|---|
| Developers | PowerUserAccess | Can manage resources but cannot manage IAM |
| DevOps | AmazonEC2FullAccess | Can manage EC2 instances and networking |
| Security | SecurityAudit | Can read logs and account information |
| Admin | AdministratorAccess | Full admin permissions, use MFA, replace root for daily tasks |
Add Users to Groups
- While creating a user or editing an existing user, select the appropriate group:
| User | Group |
|---|---|
| john.developer | Developers |
| emily.ops | DevOps |
| sarah.security | Security |
| emre.berber | Admin |
Enable MFA for Users
- Go to IAM → Users → [username] → Security credentials → Manage MFA
- Choose Virtual MFA device or hardware key
- Scan the QR code with your Authenticator app
- Enter two consecutive codes to activate MFA
MFA is required for all users with high privileges. This makes your AWS account safer and follows best practices.
Creating Custom Policies
Understanding Policy JSON Structure
Every IAM policy is a JSON document with this structure:
1
2
3
4
5
6
7
8
9
10
{
    "Version": "2012-10-17",
    "Statement": [
        {
            "Effect": "Allow",
            "Action": ["s3:GetObject"],
            "Resource": "arn:aws:s3:::bucket-name/*"
        }
    ]
}
Key components:
| Component | Description | Example |
|---|---|---|
Version | Policy language version. Always use "2012-10-17" (current version). | "2012-10-17" |
Statement | Array of permission statements. Each statement defines one permission rule. | [{...}] |
Effect | Either "Allow" or "Deny". Defines if the statement allows or blocks access. | "Allow" or "Deny" |
Action | List of AWS actions (like s3:GetObject, ec2:StartInstances). Use * for all actions. | ["s3:GetObject"] |
Resource | ARN of the AWS resource. Use * for all resources (not recommended for security). | "arn:aws:s3:::bucket-name/*" |
Tip: You can have multiple statements in one policy. Each statement is evaluated independently.
S3 Read-Only Access Example
In this step, we will create a custom IAM policy to give read-only access to a specific S3 bucket. This is a common scenario in real projects and helps us practice resource-level permissions and the Principle of Least Privilege.
Scenario
- Project: AcmeApp
- S3 bucket:
acme-app-logs - User:
sarah.security - Requirement: Security team can only read the bucket. They cannot write or delete objects.
Create the Custom Policy
- Go to IAM → Policies → Create policy
- Select the JSON tab
- Paste the following JSON:
1
2
3
4
5
6
7
8
9
10
11
12
13
14
15
16
{
    "Version": "2012-10-17",
    "Statement": [
        {
            "Effect": "Allow",
            "Action": [
                "s3:GetObject",
                "s3:ListBucket"
            ],
            "Resource": [
                "arn:aws:s3:::acme-app-logs",
                "arn:aws:s3:::acme-app-logs/*"
            ]
        }
    ]
}
- Click Next: Review
- Give the policy a name:
S3ReadOnly_SecurityTeam→ Click Create policy
Always use resource-level permissions instead of giving full S3 access. This follows the Principle of Least Privilege.
Attach Policy to the User
- Go to IAM → Users → sarah.security → Add permissions → Attach policies directly
- Find
S3ReadOnly_SecurityTeam→ select it → Add permissions
Now sarah.security can only read the bucket
acme-app-logs. She cannot delete or upload files.
Testing S3 Access via CLI
We will now test the read-only access for the user sarah.security on the bucket acme-app-logs.
Create Bucket
- AWS Console → S3 → Create bucket
- Bucket name: acme-app-logs
- AWS Region: ex. us-east-1
- Object Ownership: ACLs disabled (recommended)
- Block Public Access: Keep all options checked (recommended for security)
- Click Create bucket
Prepare AWS CLI
Make sure AWS CLI is installed:
1
aws --version
Configure CLI with sarah.security credentials (Access Key & Secret Key):
1
aws configure
- AWS Access Key ID → sarah.security key
- AWS Secret Access Key → sarah.security secret
- Default region → us-east-1
- Output format → json
Test Read Permissions
- List bucket contents:
1
aws s3 ls s3://acme-app-logs
Should return the objects (or empty list if none)
- Read an object (example):
1
aws s3 cp s3://acme-app-logs/log1.txt ./log1.txt
File should download successfully
Test Write Permissions (Should Fail)
1
2
touch ./test.txt
aws s3 cp ./test.txt s3://acme-app-logs/test.txt
Should return:
1
upload failed: ./test.txt to s3://acme-app-logs/test.txt An error occurred (AccessDenied) when calling the PutObject operation: User: arn:aws:iam::526354943578:user/sarah.security is not authorized to perform: s3:PutObject on resource: "arn:aws:s3:::acme-app-logs/test.txt" because no identity-based policy allows the s3:PutObject action
We tested the S3 read-only access for
sarah.securityusing the CLI. She can list and download objects from the bucketacme-app-logs. Any attempt to upload or delete files fails. This confirms that our custom policy works correctly and follows the Principle of Least Privilege.
IAM Roles and Temporary Credentials (STS)
When to Use Roles vs Users
Understanding when to use IAM roles versus IAM users is important:
| Aspect | IAM User | IAM Role |
|---|---|---|
| Credentials | Permanent (access keys, password) | Temporary (via STS) |
| Use Case | People or applications that need long-term access | Applications, services, or temporary access |
| Best For | Human users, CI/CD systems, external services | EC2 instances, Lambda functions, cross-account access |
| Security | Credentials must be rotated manually | Credentials expire automatically |
| Sharing | One user, one set of credentials | Multiple entities can assume the same role |
Use IAM Users when:
- A person needs to access AWS Console or CLI
- An application needs permanent credentials
- You need to track actions to a specific identity
Use IAM Roles when:
- An EC2 instance needs to access AWS services
- A Lambda function needs permissions
- You need temporary access with automatic expiration
- Multiple users/services need the same permissions
Best practice: Use roles for applications and services. Use users only for human access. This improves security by using temporary credentials.
Scenario
- Developer john.developer needs temporary access to
acme-app-logsbucket. - We will create an IAM Role and let the developer assume the role using STS.
- Temporary credentials have a configurable expiration time.
Create Role via UI
- Go to IAM → Roles → Create role
- Select AWS service → EC2 (UI requires a service; EC2 is easiest for testing)
- Attach permissions:
AmazonS3FullAccess(or a custom policy with only the required S3 actions) - Name the role:
DevS3AccessRole→ Create role
Note: Choosing EC2 is only for UI use case. You don’t need to launch an EC2 instance to test the role.
Trust Policy
- Problem: Even with AdministratorAccess, emre.berber could not assume the role.
- Reason: Trust Policy defines who is allowed to assume the role. User must be listed as Principal.
- Solution: Edit DevS3AccessRole → Trust relationships → Edit policy:
1
2
3
4
5
6
7
8
9
10
11
12
13
14
{
    "Version": "2012-10-17",
    "Statement": [
        {
            "Effect": "Allow",
            "Principal": {
                "AWS": [
                    "arn:aws:iam::526354943578:user/emre.berber"
                ]
            },
            "Action": "sts:AssumeRole"
        }
    ]
}
Important: You cannot use group ARN in trust policy. Only individual users or AWS services can be principals.
Assume Role via CLI
1
2
3
4
aws sts assume-role \
  --role-arn arn:aws:iam::JOHN_DEVELOPER_ACCOUNT_ID:role/DevS3AccessRole \
  --role-session-name DevSession \
  --duration-seconds 3600
| Parameter | Description |
|---|---|
--role-arn | ARN of the IAM role you created |
--role-session-name | Name for the temporary session |
--duration-seconds | Duration for temporary credentials (default 3600s = 1 hour, max 43200s = 12 hours) |
Returns temporary credentials:
1
2
3
4
5
6
7
8
{
    "Credentials": {
        "AccessKeyId": "ASI...",
        "SecretAccessKey": "abcd...",
        "SessionToken": "FQoGZXIvYXdz...",
        "Expiration": "2025-11-22T15:30:00Z"
    }
}
Use Temporary Credentials
1
2
3
4
5
6
7
8
9
export AWS_ACCESS_KEY_ID=ASI...
export AWS_SECRET_ACCESS_KEY=abcd...
export AWS_SESSION_TOKEN=FQoGZXIvYXdz...

aws s3 ls s3://acme-app-logs
aws s3 cp ./test.txt s3://acme-app-logs/test.txt

aws s3 ls s3://acme-app-logs
2025-11-22 14:11:45          0 test.txt
When your session expires, you will receive an error like this
1
An error occurred (ExpiredToken) when calling the ListObjectsV2 operation: The provided token has expired.
- Can I change the duration of a session?
Not for an existing temporary session. However, when you assume the role again, you can set a different duration using the –duration-seconds parameter.
- Can I revoke temporary credentials?
There is no direct way to revoke an existing session. You can remove the user from the trust policy or adjust the role’s permissions, which prevents new sessions and eventually invalidates existing temporary credentials.
Permission Boundaries
Permission boundaries set the maximum permissions a user or role can have. They don’t grant permissions - they only limit what permissions can be granted.
Think of it like this: You give someone a lot of permissions (maybe through a group), but you want to cap what they can actually do. The boundary acts as a ceiling.
How It Works
When you attach a permission boundary to a user or role:
- The user/role can only use permissions that are both in their attached policies and allowed by the boundary
- Permission in policy but not in boundary → DENIED (Boundary acts as a ceiling - even if policy allows it, boundary blocks it)
- Permission in boundary but not in policy → DENIED (Policy doesn’t grant it - boundary alone is not enough)
Example:
- Policy allows: S3, EC2, RDS
- Boundary allows: S3, EC2
- Result: User can only use S3 and EC2 (RDS denied because it’s not in boundary)
Real-world example:
You have a DevOps team member who needs to create IAM users for developers:
- You give them
IAMFullAccessso they can create users - But you set a permission boundary that only allows S3 and EC2 permissions
- Result: They can create users, but those users can only get S3 and EC2 permissions, nothing else
Another example:
- User is in a group with
AdministratorAccesspolicy - But you set a permission boundary that only allows S3 and EC2 access
- Result: Even though they have AdministratorAccess, they can only access S3 and EC2
Use Cases
- Limiting group permissions: User is in a powerful group, but you want to restrict them to specific resources (like your example - admin group but only certain resources)
- Delegating IAM management: Give someone permission to create users, but limit what permissions those new users can have
- Preventing privilege escalation: Ensure users cannot grant themselves more permissions than allowed
- Multi-tenant environments: Limit what permissions can be assigned in different parts of your organization
Setting Up Permission Boundaries
- Create a policy that defines the maximum permissions allowed
- Go to IAM → Users → [username] → Permissions → Permission boundaries
- Select Set boundary → Choose your boundary policy
- Click Set boundary
Permission boundaries are useful when you need to delegate IAM management but want to control the maximum permissions that can be granted.